Tiling Around Kitchen Wall Cabinets : Subway Tile Around Door : Turn off power to the kitchen.
on
Get link
Facebook
X
Pinterest
Email
Other Apps
Tiling Around Kitchen Wall Cabinets : Subway Tile Around Door : Turn off power to the kitchen.. But when you add an outlet or appliance, the project becomes more difficult. Grouting is the step that transforms a series of tiles into a cohesive backsplash. If it is expensive tile i would install the cabinets first and then install the tile around the cabinets. To replace kitchen tiles on the floor or wall without removing the cabinets, begin by clearing out the unnecessary items in the kitchen. Step 4 most cabinets have some type of bevel edge you can use for your straight line.
Before you begin tiling, check out the existing surface you'll be working on. Make sure your kitchen cabinets are clean and dry before placing the adhesive. The kitchen design i'm on has cabinets on one wall only, with tile that extends out only 4 feet from the cabinets. This diy kitchen backsplash will update the look of any kitchen. Learn how to prep and install a tile backsplash in your kitchen with these easy steps:
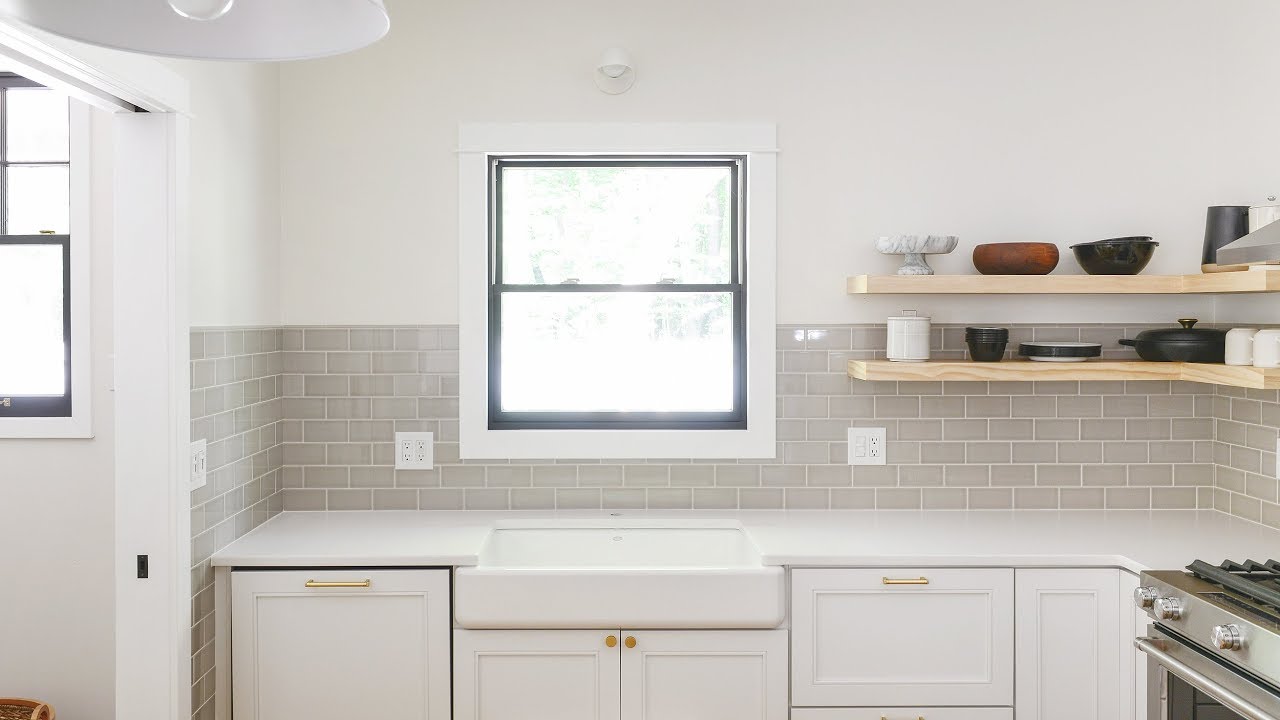
Kitchen Remodel Ideas And Inspiration Forbes Advisor Forbes Advisor from www.forbes.com In this white kitchen, the designers used clean white subway tiles for the backsplash. If it's cheaper tile it will be less cuts and less of your time in the long run to install the tile in the whole room and then place the cabinets on top. Turn off power to the kitchen. Proper measurements will help keep tile installation costs down. If it did wrap onto that wall, the two sides of the door would be hard to balance and likely a bit awkward. Honestly, for this, i think it's best to redo the upper cabinet. This diy kitchen backsplash will update the look of any kitchen. Next, put masking tape on the edges of the cabinets to protect them from damage.
Personally, i prefer to tile under the cabinets, but if someone is putting in $15 per square foot tiles, it can get expensive for something that will be hidden under the cabinets.
To replace kitchen tiles on the floor or wall without removing the cabinets, begin by clearing out the unnecessary items in the kitchen. In this video, craig takes us throug. Cover any vents and remove the moldings using a pry bar. If it did wrap onto that wall, the two sides of the door would be hard to balance and likely a bit awkward. From tile manufacturer hakatai, this kitchen wall idea is a backsplash that extends from countertop to the bottom of the cabinets. The upper cabinet isn't taken far enough down the wall, ultimately causing you to end up with the awkward situation of countertop needing a splash in a rather long segment with no uppers to run the backsplash into. If it is expensive tile i would install the cabinets first and then install the tile around the cabinets. The edging strip will also prevent drips through that space. When autocomplete results are available use up and down arrows to review and enter to select. Make sure your kitchen cabinets are clean and dry before placing the adhesive. If the kitchen is already in place, then remove the plinths, tile to just beyond them, trim and refit. Craig philips shares his top tips to installing splashback tiles in a brick effect using metro tiles from tile mountain. It seems a little silly for a third of the tile to be under the cabinets, but it did occur to me that it would be hard to replace the dishwasher if i didn't tile underneath.
Before you begin tiling, check out the existing surface you'll be working on. And what a quick job it made of the sanding step! Tiling right under the cabinets means that you can install all the tile and not have as many cuts to worry about, and your cuts against the wall will be covered, so. If you have saved spare tiles, finish laying the floor up to the wall, and then install your new cabinets. From tile manufacturer hakatai, this kitchen wall idea is a backsplash that extends from countertop to the bottom of the cabinets.
Uuutscx Qlyufm from centsationalgirl.com Step 4 most cabinets have some type of bevel edge you can use for your straight line. The tiles come together to form a decorative art piece—making them the perfect choice for a creative kitchen accent wall. In this example, the tile ends at the corners instead of wrapping onto the small wall with the doorway. To replace kitchen tiles on the floor or wall without removing the cabinets, begin by clearing out the unnecessary items in the kitchen. I am going to tile around my island in the kitchen, how should i do the transition? Tiling right under the cabinets means that you can install all the tile and not have as many cuts to worry about, and your cuts against the wall will be covered, so. This diy kitchen backsplash will update the look of any kitchen. So, what it comes down to is how much is your time or the tile contractor's time worth?
Or should i cut the cabinet wall and slide a little bit of the tile under the cabinet wall?
The kitchen design i'm on has cabinets on one wall only, with tile that extends out only 4 feet from the cabinets. Next, put masking tape on the edges of the cabinets to protect them from damage. Tape off outlets, switches, cabinets and the area where your countertops meet the walls. In this example, the tile ends at the corners instead of wrapping onto the small wall with the doorway. Step 4 most cabinets have some type of bevel edge you can use for your straight line. As in, less than a half hour for the entire bottom half of the kitchen walls (from the bottom of the upper cabinets to the. Use a circuit tester to ensure the power is off and remove outlet covers and switch plates in the area to be tiled. Make the tiles run up the entire side wall and go all the way to the ceiling. To replace kitchen tiles on the floor or wall without removing the cabinets, begin by clearing out the unnecessary items in the kitchen. Typically, the counter, upper cabinets and wall all end at different places on the sides, leaving no definitive stopping point. It seems a little silly for a third of the tile to be under the cabinets, but it did occur to me that it would be hard to replace the dishwasher if i didn't tile underneath. The tiles come together to form a decorative art piece—making them the perfect choice for a creative kitchen accent wall. The upper cabinet isn't taken far enough down the wall, ultimately causing you to end up with the awkward situation of countertop needing a splash in a rather long segment with no uppers to run the backsplash into.
Move freestanding appliances away from the walls. A tile backsplash combined with a new range hood can quickly and dramatically transform a dull kitchen. Turn off power to the kitchen. If you lay the tiles up to the cabinets and in future want to replace the cabinets, all you have to do is cut along the grout lines of the partial tiles and smash them out. In this video, craig takes us throug.
How To Tile A Kitchen Backsplash Or Any Wall Really Youtube from i.ytimg.com If it all possible, take your cabinets to the ceiling. Proper measurements will help keep tile installation costs down. In this example, the tile ends at the corners instead of wrapping onto the small wall with the doorway. This diy kitchen backsplash will update the look of any kitchen. From tile manufacturer hakatai, this kitchen wall idea is a backsplash that extends from countertop to the bottom of the cabinets. It's a damn sight easier, covers all eventualities, and only costs a wee bit more. Even if the uppermost panels are faux (like they are in my kitchen), it makes the ceiling appear higher and the room to appear larger. Before you begin tiling, check out the existing surface you'll be working on.
In fact, backsplashes are a great way to learn how to tile in the first place.
Before you begin tiling, check out the existing surface you'll be working on. When autocomplete results are available use up and down arrows to review and enter to select. If the kitchen is already in place, then remove the plinths, tile to just beyond them, trim and refit. Should i leave a gap between the tile and the island wall, and then use quarter round to cover the gap? Contrast is another basic principle of design in architecture. If it all possible, take your cabinets to the ceiling. If it's cheaper tile it will be less cuts and less of your time in the long run to install the tile in the whole room and then place the cabinets on top. Don't worry about your cabinets not being completely flush with tiles. The tiles come together to form a decorative art piece—making them the perfect choice for a creative kitchen accent wall. To replace kitchen tiles on the floor or wall without removing the cabinets, begin by clearing out the unnecessary items in the kitchen. The upper cabinet isn't taken far enough down the wall, ultimately causing you to end up with the awkward situation of countertop needing a splash in a rather long segment with no uppers to run the backsplash into. This diy kitchen backsplash will update the look of any kitchen. But when you add an outlet or appliance, the project becomes more difficult.


Comments
Post a Comment